Setting Up a Devcontainer Development Environment
The easiest way to get started with development is to use Visual Studio Code with devcontainers. This approach creates a preconfigured development environment with the necessary tools, and is enabled for all Home Assistant repositories. Since the Docker-based devcontainer concept provides a layer of abstraction, the following guides merge at one point.
First, install Visual Studio Code, next follow one of the next chapters based on your system.
Setup on Windows
Quick start guide
- Install WSL2 and enable systemd support.
- Install the Docker engine based on your selected WSL2 Linux distribution.
- Fork and clone the desired code repository within the WSL2.
- Start the devcontainer.
Install WSL2
This section outlines the steps for Windows 10 (version 2004 and later) and Windows 11. If you're still running an older version, follow these manual installation steps.
-
Run the following command in the Windows terminal to install the needed features to run WSL and install the default Ubuntu distribution:
wsl --install -
Check the WSL version, if the version is already 2, skip the "set wsl version" step.
wsl -l -v -
Set the WSL version to 2 if necessary (replace
<distro name>with the installed distribution name; see the output above).wsl --set-version <distro name> 2
Enable systemd support in WSL2
Since the Docker engine is installed as systemd service, we need to ensure systemd support is enabled in the WSL2.
-
Start the WSL shell by issuing just the
wslcommand in the Windows terminal. -
Add the following lines to
/etc/wsl.conf; you will need to open the file with root privileges (for example,sudo nano /etc/wsl.conf):[boot]systemd=true -
Shutdown WSL2 with the following command on the Windows terminal:
wsl --shutdown -
Start the WSL shell again and run the following command to check that systemd is running:
systemctl list-units
Follow "Setup on Linux"
From this point on, you can follow the Setup on Linux instructions below, note that all steps must be performed within the WSL2 shell. When choosing the correct steps to install the docker engine, use the installed WSL2 distribution (the default is Ubuntu).
Setup on Linux
Quick start guide
- Install the Docker engine based on your Linux distribution.
- Fork and clone the desired code repository.
- Start the devcontainer.
Install Docker Engine
Since these instructions vary depending on your Linux distribution, we only provide a rough overview. For detailed instructions, follow the official Docker engine install guide.
- Update all installed packages.
- Add the Docker repository for your package manager (like
yumorapt). - Update your package repository package index.
- Install the Docker engine packages.
- Follow the Linux post-installation steps for Docker Engine instructions to allow non-root users to use Docker.
Setup on macOS
Quick start guide
- Install Docker Desktop.
- Fork and clone the desired code repository.
- Start the devcontainer.
Install Docker Desktop
Since the installation steps are well documented and may change over time, we refer to the official Install Docker Desktop on Mac guide.
Fork the repository and start the devcontainer
Since this slightly differs between our code repositories, the following is a generic guide.
-
Open the desired code repository on GitHub (for example, the Home Assistant Core repository), and click on "fork".
-
Once your fork is created, copy the URL of your fork and clone it to a local directory on your computer.
cd $HOMEgit clone <URL> -
Change into the directory of your fork and start Visual Studio Code from there:
cd <FORKNAME>code . -
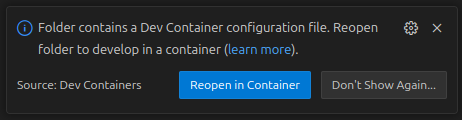
Visual Studio Code will automatically detect the devcontainer and prompt to "Reopen in Container" (bottom right corner) - click on it.